The .xml sitemap file that is used for SEO purposes on your website must be placed in the root folder of your MRP WebDrive
Download a zipped file for the custom-sitemap.xml here
1 - Log in to Private Office:
- A. Enter the URL private-office.myrealpage.com
- B. Enter your username (the email address you used when signing up).
- C. Enter your password (which you chose during the sign-up process).
- D. Click Login.
2 - From the Dashboard:
- A. Click the Website tab.
- B. Click All Web Pages.
-1.jpg?width=688&height=292&name=1yRyWe_Es-atSKZclspOPD65P7JnRGoa9g%20(9)-1.jpg)
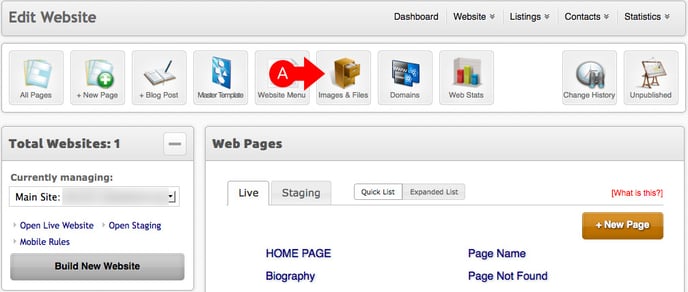
3 - Click on:
- A. Click on the Images & Files tab.
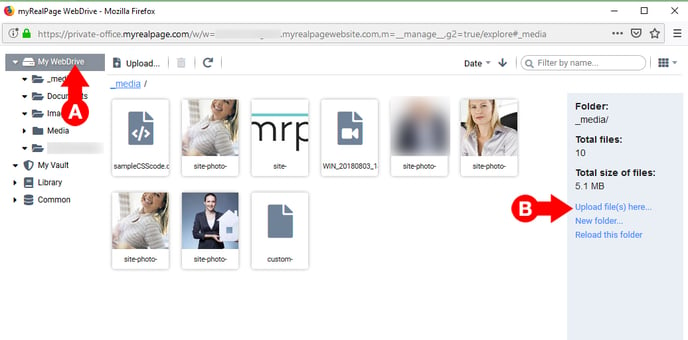
4 - In The Web-Drive:
- A. IMPORTANT: Make sure to select and highlight the root/main folder labeled My Web-Drive. This is where you must upload your new robots file in order for it to work.
- B. Click the Upload file(s) here... link.
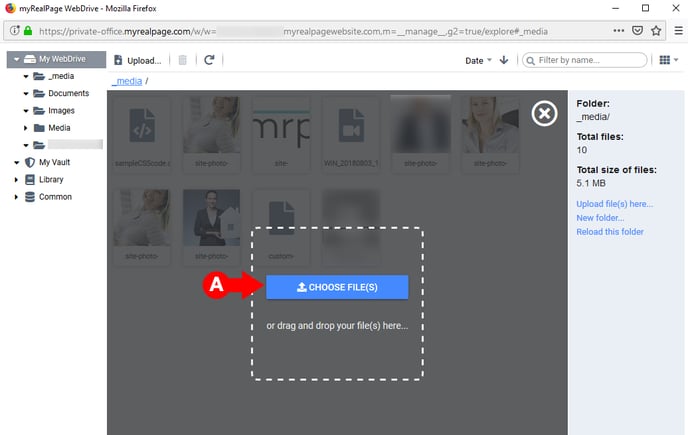
5 - In the Pop-Up Window:
- A. Click on the Choose File(s) button.
- You can also choose to drag and drop your custom-sitemap file anywhere in the dark gray area. If you choose to do this, skip ahead to step 7 of this guide.
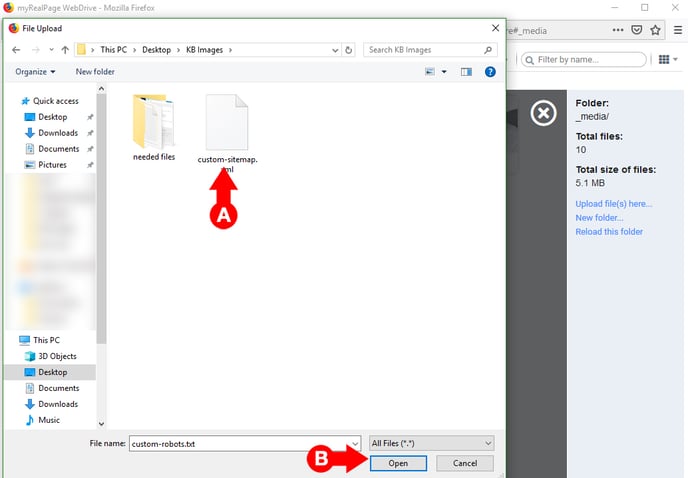
6 - From your file browser:
- A. Locate and click on your file.
- B. Click on the Open button. The uploading process will begin immediately.
7 - Upload confirmation
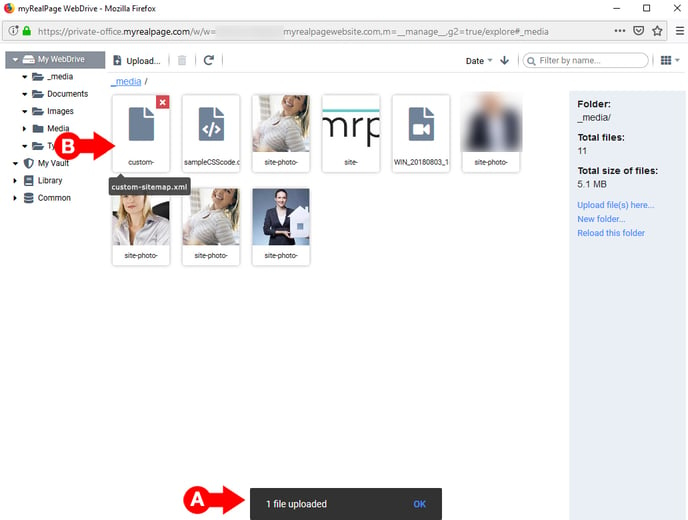
- A. Once the file has been uploaded, you will see a confirmation appear at the bottom of the Web-Drive window.
- B. You will now be able to see your new custom-robots file in your Web-Drive. Your website will now recognize that this is the file it should use.
Click here to learn how to add your sitemap to Google Webmasters/Google Search Console
Click here to learn how to add your sitemap to Bing
.png?height=120&name=myrealpage-2022-logo-v3%20(1).png)