How to Install and Setup the WordPress Plugin
This article will guide you on how to install and setup the myRealPage WordPress plugin on your WordPress website.
Login to your WordPress website
- Click here for further information on logging into WordPress
1 - Click on "Plugins" on the the left hand sidebar:

2 - Click "Add New Plugin" on the left hand sidebar under Plugins:

3 - Download the myRealPage WordPress plugin:
- Download Now (Note: Keep note of where you download this, as you will need it for the next step)
4 - Click on the "Upload Plugin" button at the top of the window:

5 - Click "Choose File" and select the recently downloaded plugin from above:
- File should will be named: myRealPage-wordpress-plugin-master.zip

6 - Once the file is selected, click "Install Now":

7 - Once the plugin has been installed, click "Activate Plugin":

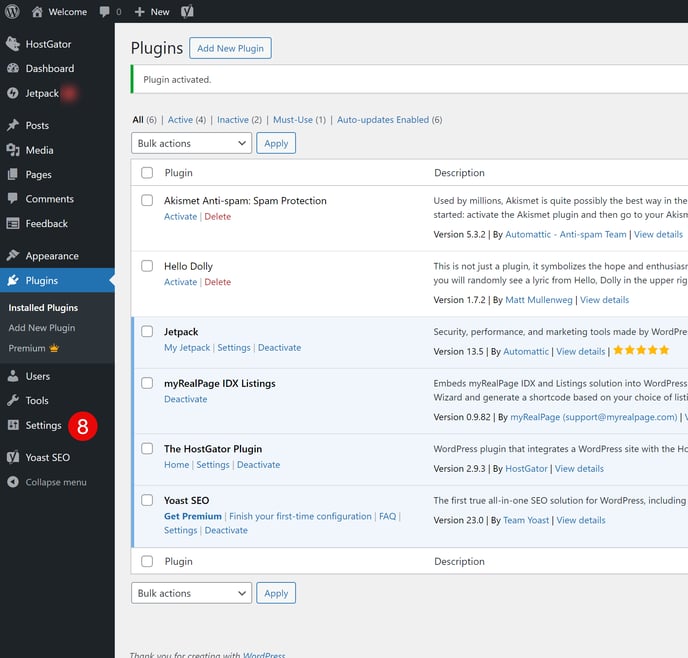
8 - Plugin will now display in your list of Installed Plugins:

9 - Click "Settings" in the left hand toolbar:

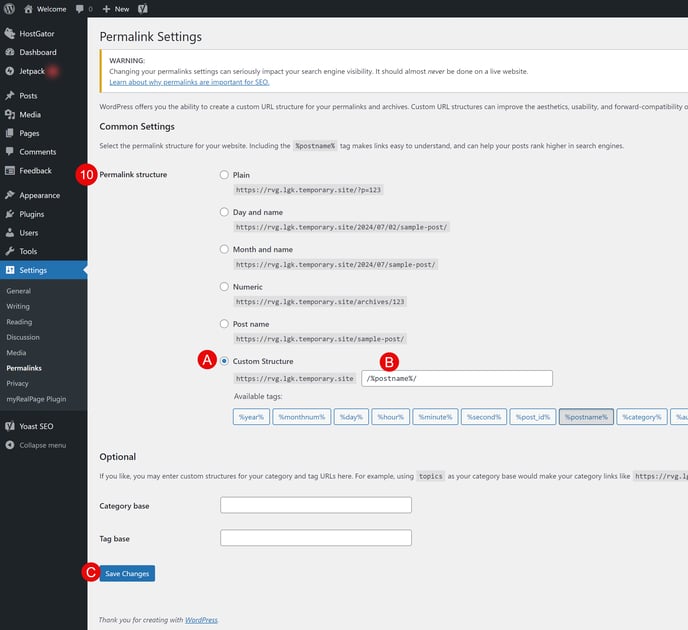
9 - Click on "Permalinks" below Settings in the left hand toolbar:

10 - Under "Permalink structure" update the settings:

- A. Custom Structure: Select the Custom Structure option from the list
- B. Structure: For the structure, use /%postname%/ (Note: This option can also be found from the available tags list below the options)
- C. Save Changes: Once settings have been updated, click the "Save Changes" button at the bottom of the window
11 - Your myRealPage WordPress plugin is now ready to to be used!
- Click here to learn how to add the myRealPage WordPress plugin to your pages.