How Do I Create A Predefined Search With The Wordpress Plugin?
This article will summarize how to create a predefined search and add it to your WordPress website.
You can only generate codes for predefined searches one at a time. To add multiple predefined searches to your Wordpress post or page, you will have to generate separate codes for each search.
Login to your WordPress website
- Click here for further information on logging into WordPress
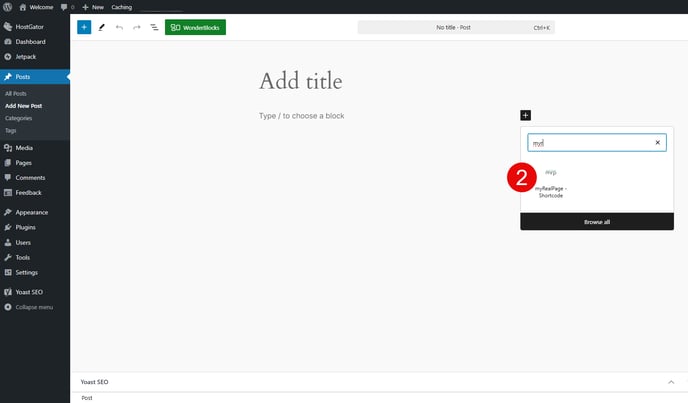
1 - On the page/post you want to add listings to, click on the "+" icon to add a block:

2 - Add the "myRealPage - Shortcode" block to your post/page:

3 - Click on "Retrieve myRealPage Shortcode" button on the newly added block:

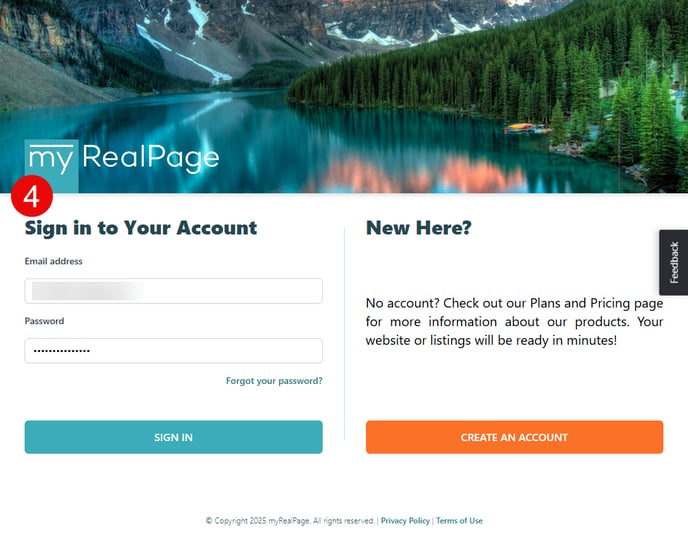
4 - In the popup login window, login to your myRealPage account:

5 - In the same popup window, select the "Searches" tab under the Choose what SET of LISTINGS to generate the code for title:

6 - Click on the "+ New Search" button under the Searches tab:

7 - In the pop up window, set up your search parameters:

For more information regarding how to set up searches, please check out the following articles:
- How to Create a Predefined Map Search (Skip to Step 4)
- How to Create a Predefined Area Search (Skip to Step 4)
- How Do I Create An Open House Predefined Search? (Skip to Step 4)
8 - Once your search criteria is ready, click the "Next >" button in the bottom right corner:

9 - Finish setting up your new search with a Name and other optional information:

- A. Search Name: Give your search a name for internal use (This name will show up in your list of searches when selecting previously made searches)
- B. Title: Give your search a Title, which will show up on your webpage, above the search results
- C. Description (Optional): Give your search a description, which will be used for META Page Description (SEO)
- D. Introduction Text (Optional): Write a brief introduction which will display under the Title on your webpage, above the search results
Treat introduction as HTML - Select option to use HTML code in the text area
Show introduction text on the first page only - Select option to only display introduction text on the results page, and not on the details pages once you select a listing - E. Other Options (Optional): Choose wheatear or not to enable Reciprocity or VOW search results, or to hide your search from showing up in the Pull Down menu on listings pages
10 - Click on the "save" button in the bottom right corner:

11 - In the previous window, select the newly created search from the list of available searches:

12 - Fine Tune your settings:

- A. Use Version: select between the Standard or Responsive (Recommended) version of listings
- B. Custom Sort: Select how your listings will be sorted by default
- C. Items Per Page: Select how many listing results will display per page
- D. Show Slider Filters: Show slider filter controls for listing results
- E. Initially Collapse Filters: Show slider filter controls in a collapsed/hidden mode
- F. Open Details in (Advanced): Here you can specify under what page listing details will be shown when a listing item is clicked. Please ensure the page has a listing weblet (or shortcode in WordPress) capable of displaying listing details. For example recip.html or /listings/ in WordPress.
13 - Click on the "Generate Shortcode" at the bottom of the window:

14 - Click on "Send to WordPress" in the following window:

15 - Save/Update/Publish your changes:
