How Do I Add Listings To My Wordpress Site?
This article will summarize how to add listings to your WordPress website.
Login to your WordPress website
- Click here for further information on logging into WordPress
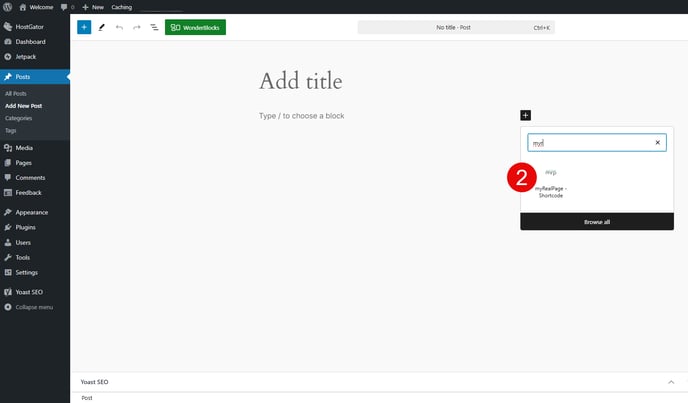
1 - On the page/post you want to add listings to, click on the "+" icon to add a block:

2 - Add the "myRealPage - Shortcode" block to your post/page:

3 - Click on "Retrieve myRealPage Shortcode" button on the newly added block:

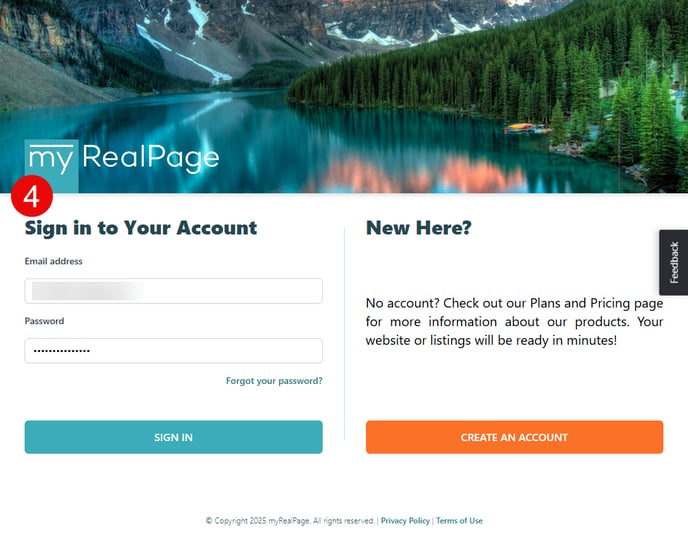
4 - In the popup login window, login to your myRealPage account:

5 - In the same popup window, select your listing(s) source (My Listings, Office Listings, MLS®#, or Predefined Searches):

6 - Select your desired listing(s) by clicking the "Select >>" button to select the entire group, or the "Select >>" button next to individual listings to add only select listings:

7 - If selecting by Group, you can select filter out listings by using the drop down in the right hand column (Optional):

8 - Fine tune your settings (Optional):

- A. Use Version: select between the Standard or Responsive (Recommended) version of listings
- B. Custom Sort: Select how your listings will be sorted by default
- C. Items Per Page: Select how many listing results will display per page
- D. Show Slider Filters: Show slider filter controls for listing results
- E. Initially Collapse Filters: Show slider filter controls in a collapsed/hidden mode
- F. Open Details in (Advanced): Here you can specify under what page listing details will be shown when a listing item is clicked. Please ensure the page has a listing weblet (or shortcode in WordPress) capable of displaying listing details. For example recip.html or /listings/ in WordPress.
9 - Click on the "Generate Shortcode" button at the bottom of the window:

10 - Click on the "Send to WordPress" button in the following pop up window:

11 - Save/Update/Publish your changes:
