To successfully login to myRealPage, you will need to use one of the following three browsers:
Once one of the above browsers is installed on your computer you can access myRealPage.

Logging in to myRealPage:
- Enter the following URL in your address bar private-office.myrealpage.com or type in your domain with "/login" at the end (example.com/login).
- Enter your username (the e-mail address you used when signing up).
- Enter your password. If you've forgotten your password, click on the "Forgot your password?" link to reset it. You may also reset it here.
- Click the button "Sign In"
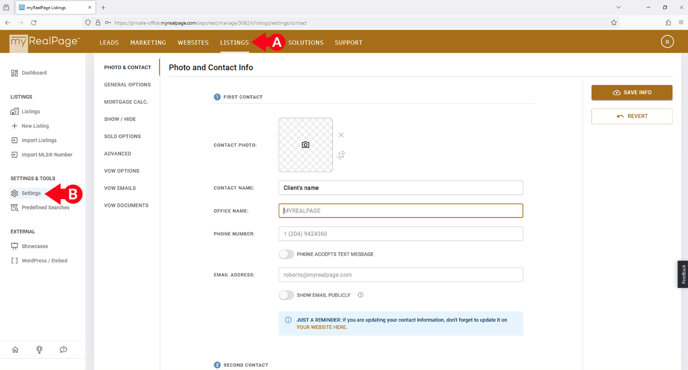
2 - From The Dashboard:
- A. Click the Listings tab.
- B. Click Settings.
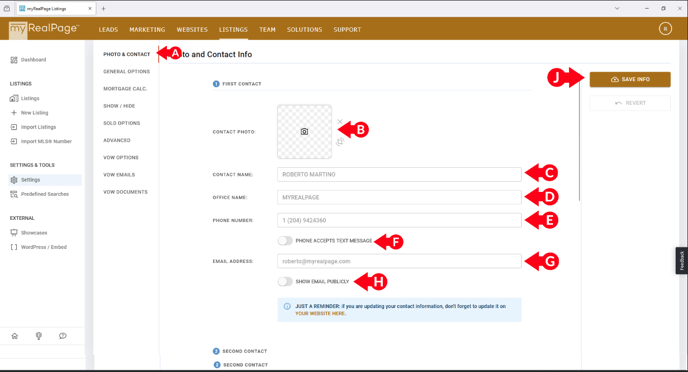
3 - From The Contact Information for Listings Page:
- A. Click the Photo & Contact tab.
- B. Add the Main Contact's Photo.
- C. Add the Main Contact's name.
- D. Add your office name.
- E. Add your phone number.
- F. Indicate if your number accepts SMS/text messages.
- G. Add your email address.
- H. Choose whether to show your full email address, or use a masked link.
- H. Upload an agent photo.
- (Optional) Add yours or a colleague's contact information as secondary contact points. If you don't have any secondary contact information, you can leave these fields blank
- J. After any changes, click Save.
Click here to learn how to add your company logo to listings